
If you've ever served in a media booth, you know the moment: the pastor needs the next slide, the band needs a monitor change, and the only way to tell you is a wave from across the room, in the middle of the service.
So we built a call light. The pastor, the musicians and the choir each have one small button. Press it, and the LED light strip on our media desk lights up in that station's own color, so we know who needs us. Hold it for seven seconds, and the desk turns solid red: a silent alert that shows nothing at the button, so nobody nearby can tell it was sent.
It runs on inexpensive ESP32 boards that talk to each other by radio, and the booth board controls an off-the-shelf Bluetooth LED strip. Every call board is wired exactly the same way, and you add as many as you need, up to 8. Each board also has its own setup page you open on your phone: name each station and pick its color, choose the light strip, put the boards on your church Wi-Fi for longer range and acknowledge calls. There's no app to install, no coding and no soldering. The firmware is a free download, and this post walks through every part and step.
This is a convenience signal for your media team, not a certified alarm or security system. Keep your church's normal safety procedures in place.
How it fits together
The call-button boards talk to the booth board directly by radio (ESP-NOW; no router needed). If you put the boards on your church Wi-Fi, calls also travel over the network, and the radio link stays on as a backup. The booth board then sets the color of the LED strip over Bluetooth, so there are no wires between the board and the strip.
Every call board runs the same firmware and is wired the same way. Which station a board is, its name, its color and its light effect, is set on the setup page. This post builds the setup we use: a booth and three call buttons (pastor, musicians, choir). Add more call boards the same way, up to 8 stations.
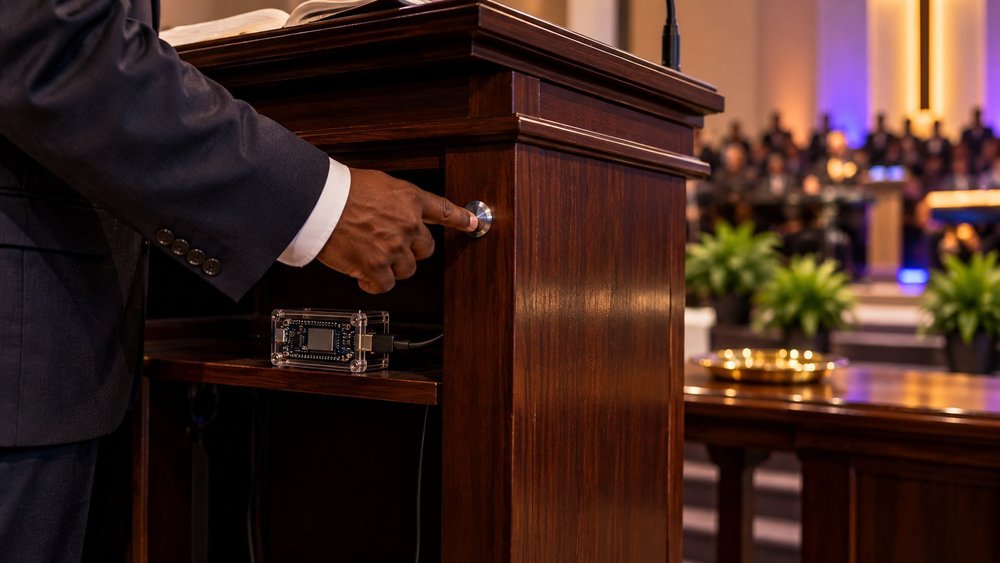
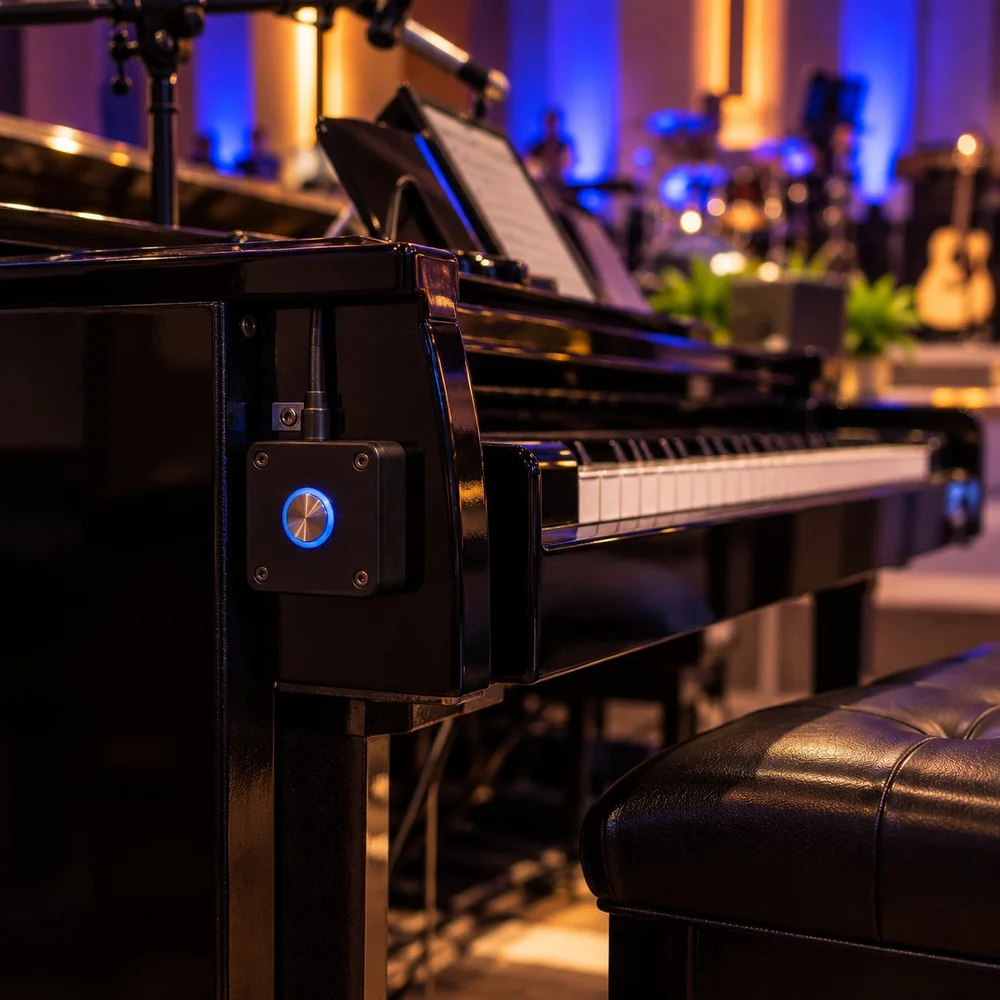
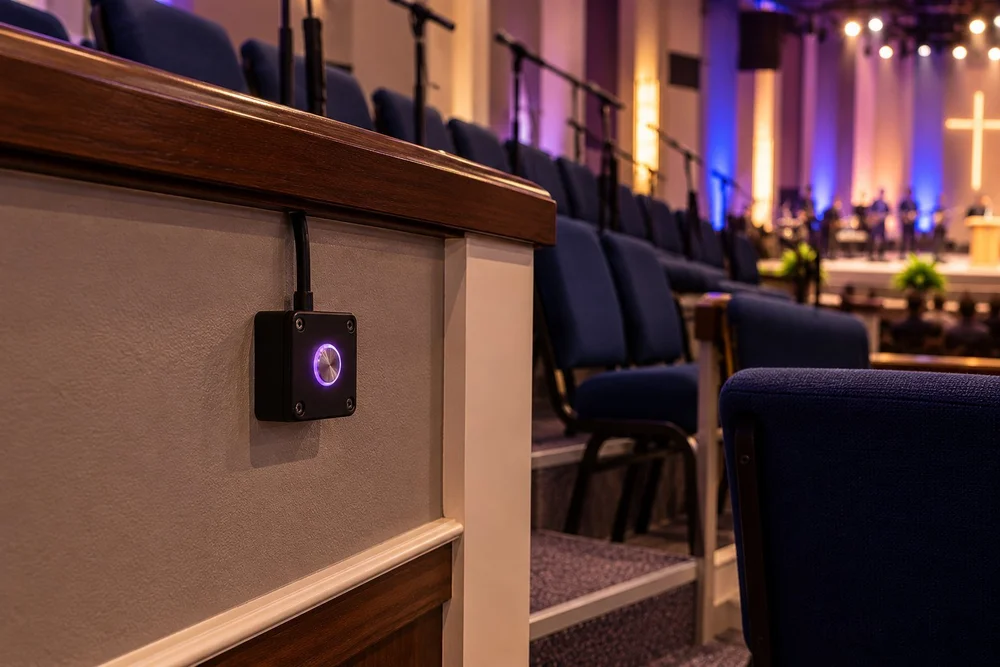
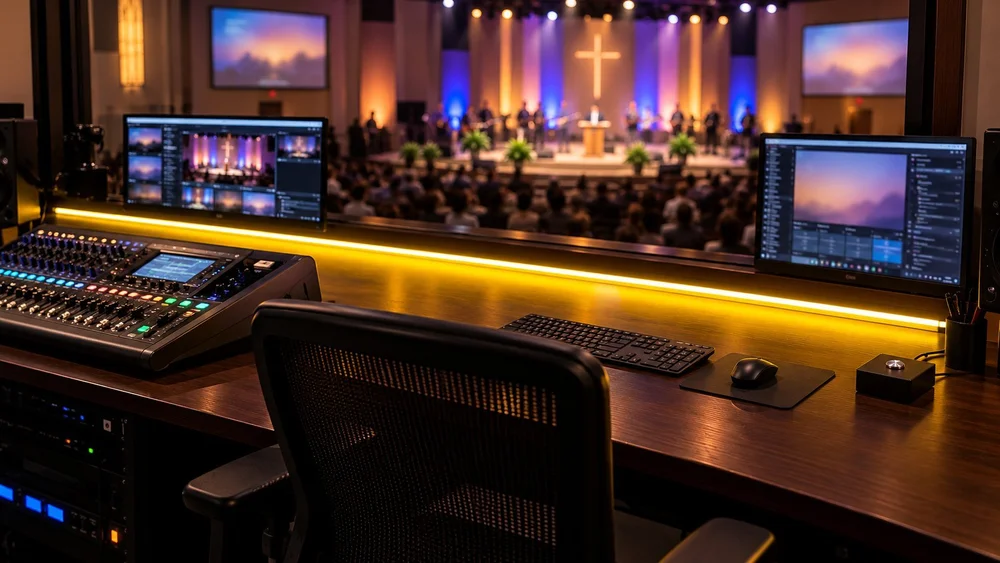
| Board | Where it goes | Button wired to | Quick press | Hold 7 seconds |
|---|---|---|---|---|
| Call board (one per station, up to 8) | Pastor's podium, music stand, choir area… | D33 + GND | That station's color (for example Pastor: yellow) | Silent red alert |
| Booth board | Media desk, near the light strip | Acknowledge: D4 + GND | Clears the call showing | Hold 2 s to clear red |
- With no calls, the booth strip is steady white room light.
- Each station has its own color, with a pulse, flash or solid effect. No two stations can share a color, and red is reserved for the red alert.
- Red outranks everything. Two calls at once take turns on the strip.
- "Silent" means the button board shows nothing when red is sent, so nobody nearby can tell.
- By radio alone, range is well past 75 ft indoors in most buildings; walls and metal reduce it. On Wi-Fi, a board can be anywhere your network reaches.
Parts list
Buy these exact items and the prebuilt firmware works as-is. As an Amazon Associate I earn from qualifying purchases.
| Part | Qty | Used for | Link |
|---|---|---|---|
| ESP32 Development Board CH340 (2 pack) | 2 packs | 4 boards: three call stations + one in the booth | Amazon |
| ESP32 computer case | 4 | Mounting under the desk, in the podium, on a music stand | Amazon |
| Type-C charger + 6 ft cable | 4 | Powers each board (and loads the firmware) | Amazon |
| 12 mm momentary push buttons (5 pcs) | 1 pack | 3 call buttons + 1 Acknowledge + 1 spare | Amazon |
| Dupont jumper wires (M-F, M-M, F-F) | 1 set | Push-on connections to the board's pins | Amazon |
| Wago lever connectors | 1 pack | Joining the button wires to the jumpers, no soldering | Amazon |
| LED Bluetooth light strip (with its own power adapter) | 1 | The booth light. The booth board controls it over Bluetooth (ELK-BLEDOM controller) | Amazon |
| V-shape LED aluminum channel (optional) | 1 | Clean, diffused mounting on the desk | Amazon |
For more stations, add one ESP32 board, case, charger and button per extra call station.
Use a supported light strip. The strip linked above is the one I use: its Bluetooth controller shows up as ELK-BLEDOM (apps: duoCo Strip, Lotus Lantern). The firmware also works with Happy Lighting strips, whose controllers show up with names like Triones, QHM-, LEDBLE-, LEDBlue- or Dream~. Strips run by other apps (Govee, Magic Home, Tuya / Smart Life and others) use different Bluetooth commands and aren't supported.
No soldering needed. The Dupont jumper wires push straight onto the ESP32's pins, and Wago lever connectors join them to the button wires: lift the lever, insert the stripped wire, close the lever. Add two-conductor wire, joined the same way, if a button sits more than a few feet from its board.
Load the firmware (no coding)
Load the firmware before wiring anything. Get the free firmware download and unzip it. Inside are two folders: call_button for every call board and booth_board for the booth board, plus FLASHING.txt with every flashing and setup step.
Built one with an earlier download? Flash every board with firmware 2.6: boards on 2.6 can't talk to boards on older firmware. The booth keeps the strip it was paired with. Then name your stations and pick their colors (Step 4).
- On Windows, install the CH340 USB driver if the board doesn't show up as a COM port. Macs usually don't need it.
- Open espressif.github.io/esptool-js in Chrome or Edge.
- Plug one board in with the Type-C cable. Click Connect and pick the port that says USB-SERIAL CH340. Won't connect? Hold the board's BOOT button while you click Connect.
- Click Add File until there are three rows, and fill them in:
| Flash address | Every call board | Booth board |
|---|---|---|
0x1000 | call_button/bootloader.bin | booth_board/bootloader.bin |
0x8000 | call_button/partition-table.bin | booth_board/partition-table.bin |
0x10000 | call_button/call_button.bin | booth_board/booth_board.bin |
- Click Program and wait for it to finish. Click Disconnect, unplug, and label the board with tape (Pastor, Musicians, Choir, Booth).
- Repeat for the other boards. Every call board gets identical files.
Build the call-button boards
Every call board is wired exactly the same: one button. The button has two wires and no polarity. No resistors are needed: the firmware turns on the ESP32's internal pull-up and filters out switch bounce. Which station a board is gets set on the setup page in Step 4, not by the wiring.
| Board | Button wire 1 | Button wire 2 |
|---|---|---|
| Every call board | D33 (GPIO33) | GND |
- Push a female-ended Dupont jumper onto D33, and another onto any GND pin.
- Join each jumper to one of the button's wires with a Wago lever connector. Either button wire can go to either jumper.
- Mount the button in a hole in the case lid (12 mm drill bit), or at the chair or stand on longer two-conductor wire joined with Wago connectors. Up to about 10 ft of wire is fine.
- Power the board from its Type-C charger. Use an outlet that isn't switched off with the room lights.
The caller's feedback light
| Small blue LED | Meaning |
|---|---|
| Fast flicker | Sending the call |
| Solid on | The booth is showing your call |
| 3 blinks, then off | The media team acknowledged it |
| Short blip every second | No contact with the booth: check power or distance |
| Off | Idle and connected |
The LED never reacts to the 7-second red alert, on purpose.
Set up the booth board and choose the light strip
The light strip keeps its own power adapter and its own Bluetooth controller box. The booth board connects to that controller the same way the phone app does, so there are no wires between the board and the strip. You pick the strip on the booth board's setup page.
- Install the strip along the media desk (in the optional aluminum channel if you like) and plug it into its power adapter.
- Add the Acknowledge button to the booth board: D4 and GND, with jumpers and Wago connectors, exactly like the call buttons. The board's BOOT button also works as Acknowledge.
- Place the booth board in its case on or under the desk, in the same room as the strip's controller box (within about 30 ft), where the media team can see its small blue status LED. Power it from its Type-C charger.
- Close the strip's phone app and turn Bluetooth off on nearby phones. The controller allows only one connection at a time, so a phone holding it blocks the booth board.
- Open the booth's setup page. A freshly flashed board turns on its own Wi-Fi hotspot for 30 minutes. On your phone, join the network
BoothLight-Booth-xxxxwith the passwordboothlight. The setup page opens by itself; if it doesn't, go tohttp://192.168.4.1. Log in with the passcodeboothlight. - Under Bluetooth light strip, tap Find strips, then Use this one next to your strip. It flashes green, then turns white. Done: the board remembers it and reconnects by itself after power cuts.
- Under Test the strip, tap a station (or Red alert, or White) to see it on the strip for 4 seconds. Each station's color shows up there once its call board has checked in.
- Each strip in the list shows its type: ELK-BLEDOM or Happy Lighting.
- Strip not in the list? Some strips don't send their name to the booth. Tick Show every Bluetooth device and search again, then find your strip by its address: the free nRF Connect app on your phone shows it under the strip's name (it looks like
36:46:40:A0:FC:02). Set Strip type to match the strip's app (Happy Lighting app: Happy Lighting), then tap Use this one. - If the strip connects but doesn't change color, set Strip type by hand and pick it again.
- Two strips nearby? Pick one and it flashes green, so you know which one you got. Flash it does that again later.
- No phone handy? Hold Acknowledge (or BOOT) for 10 seconds with no call showing: the board pairs with the nearest strip it recognizes by name.
- The hotspot turns on again whenever you hold Acknowledge while plugging the booth board in. Keep holding for 3 seconds, until the blue LED stays on.
- The strip's IR remote still works, but the board puts its own color back within 5 seconds.
The booth's status light
| Small blue LED | Meaning |
|---|---|
| Solid | A call or red alert is active |
| Double blip every 2 s | Light strip not connected: check its power, and that no phone is connected to it |
| Slow blink | A call board is offline (unplugged or out of range) |
| Fast flicker | Connecting to the light strip |
| Triple blip every 2 s | The setup hotspot is on |
| Off | All good |
Name your stations and pick their colors
Power up the call boards. Each one checks in with the booth within a few seconds and shows up on the booth's setup page under Call stations as Station 1, Station 2 and so on, with the next free color.
- On the booth's setup page, find Call stations and tap Edit next to a station.
- Give it a name: Pastor, Musicians, Choir, Keys, Drums, Lobby…
- Pick its color. Colors another station already uses are crossed out, so every station stays unique. Red isn't offered: it's reserved for the red alert.
- Pick its effect at the booth: Pulse, Flash or Solid. Tap Save.
- Not sure which board is which? Press its button: that station's call shows up on the booth's page, and on the strip.
- You can also set the name, color and effect on a call board's own setup page, under This station.
- The booth board remembers the station list, even after power cuts. Remove forgets a board you no longer use.
The colors we use: Pastor: yellow Musicians: blue Choir: purple, all on Pulse.
Put the boards on Wi-Fi and set your passcode
Out of the box, the boards talk to each other directly by radio, and that's enough for most rooms. Joining your church Wi-Fi adds a second path: calls travel over the network too, so a board can be anywhere your network reaches. It also lets you open any board's setup page from a phone or computer on that network.
- Booth board first. On its setup page, open Wi-Fi, tap Choose a network, pick your network, enter its password and tap Join. The page then shows the board's address, for example
http://booth-light.localorhttp://192.168.1.57. - Then each call board. Each one has its own hotspot,
BoothLight-Call-xxxx, for 30 minutes after power-up. To turn it on again, hold the board's call button while plugging it in, until its blue LED stays on. Join it, then join your Wi-Fi from its page the same way. - Set your own passcode. Under Settings, enter a new passcode (8 or more characters) on every board. It protects the setup pages and the hotspots, and it signs every message between the boards, so nothing else on your network can fake a call.
- Use a 2.4 GHz staff network, not a guest network. Guest networks usually stop devices from talking to each other.
- Put the booth on Wi-Fi first. All boards on Wi-Fi, or only the booth, both work. Don't put a call board on Wi-Fi while the booth isn't: they'd end up on different radio channels.
- A call board that isn't on Wi-Fi finds the booth's radio channel by itself within a few seconds.
- If your Wi-Fi password changes, a board that can't connect for 3 minutes turns its hotspot back on, so you can fix it from your phone.
- Boards with different passcodes ignore each other. The booth's page warns you when it hears one.
What's on the setup pages
| Booth board | Call boards |
|---|---|
| Calls showing now, with Acknowledge and Clear red buttons | Whether it's connected to the booth, and how (radio, Wi-Fi or both) |
| Call stations: name, color and effect; online or offline, radio or Wi-Fi, signal | This station: name, color and effect |
| Bluetooth strip: find, choose, flash, forget, strip type | Send a test call |
| Test each station's color on the strip | Wi-Fi, board name and passcode |
| Wi-Fi, board name, radio channel, passcode, hotspot, restart | Booth address (only if it can't find the booth by itself) |
| Hotspot and restart |
Red alerts never show on a call board's page, so they stay silent at the button.
Test everything before mounting
Run these on a table first, then again with each board in its final spot.
- After choosing the strip, it's white and the booth's status LED is off (or triple-blipping while its hotspot is on).
- Each call board's blue LED stops blipping within a few seconds (it has found the booth). The booth's setup page lists every call station as Online.
- Quick-press each call button: its LED flickers, then goes solid, and the strip shows that station's color and effect.
- Press Acknowledge: the strip returns to white and that call board blinks 3 times.
- Press two call buttons: the strip alternates between both colors.
- On the booth's page, try giving a station a color another station already has: it's crossed out and can't be picked.
- Hold any call button 7 s: the strip goes solid red and the call board's LED stays dark.
- A quick Acknowledge press does not clear red; holding it 2 s does.
- Unplug the strip, then plug it back in: within a few seconds it reconnects and goes white again.
- In final positions, every call board's LED stays off when idle (no blipping means good range).
- On Wi-Fi: the booth's page shows each call board as radio + Wi-Fi (or Wi-Fi), and Send test call on a call board's page lights the strip.
Everyday use
Print this and tape one copy in the booth and one near each button. Write your own stations and colors next to it: the booth's setup page lists them under Call stations.
| Booth strip | Means | Media team does |
|---|---|---|
| Steady white | All quiet | Nothing |
| A station's color | That station needs the booth (for example yellow: Pastor, blue: Musicians, purple: Choir) | Respond, then press Acknowledge |
| Solid red | Emergency (silent alert) | Follow your security plan; hold Acknowledge 2 s once handled |
In the booth: press Acknowledge, or tap Acknowledge on the booth's setup page from a phone on your Wi-Fi.
At a button: a quick press calls the booth; your small light goes solid while you're being called and blinks 3 times when the booth answers. Hold 7 seconds for an emergency: nothing lights up at your button, but the booth turns red.
Troubleshooting
| Symptom | Likely cause | Fix |
|---|---|---|
| No COM port when the board is plugged in | Missing driver or charge-only cable | Install the CH340 driver; try the 6 ft cable from the parts list |
| Flasher stuck on "Connecting…" | Board not in download mode | Hold BOOT while clicking Connect |
| Call board LED blips every second | Can't reach the booth | Check the booth board has power; move either board a few feet; keep cases away from metal |
| Booth status LED double-blips; strip doesn't change color | Strip not connected | Turn the phone's Bluetooth off; unplug and replug the strip's power; keep the booth board in the same room |
| "Find strips" finds nothing | Strip in use by a phone, or not a supported strip | Close the phone app and turn Bluetooth off. Tick "Show every Bluetooth device", find your strip by the address nRF Connect shows for it, set Strip type, and pick it. Check it's an ELK-BLEDOM or Happy Lighting strip |
| Strip connects but doesn't change color | Wrong strip type guessed from its name | Set Strip type on the booth's page, then pick the strip again |
| A different light changes color | Another strip nearby was chosen | On the booth's page, Find strips and pick yours; it flashes green when it's the right one |
| Can't find the BoothLight hotspot | Its 30 minutes are up | Hold the board's button (booth: Acknowledge) while plugging it in, until the blue LED stays on |
| Setup page won't accept the passcode | Passcode was changed | Factory passcode is boothlight. Forgot yours? In the flasher click Erase Flash, then program the board again |
| Call board says "Booth not connected" after joining Wi-Fi | Booth isn't on the same network, or it's a guest network | Put the booth on the same Wi-Fi first; use a staff network; or enter the booth's address under Settings |
booth-light.local doesn't open | Some Android phones don't support .local names | Use the number address shown on the board's page |
| Booth page warns about a different passcode | One board has another passcode | Set the same passcode on every board |
| Want to see what a board is doing | — | In the flasher page, use the Console section (Start, then Reset) to read its live log |
FAQ
Do I need to know how to code?
No. You load ready-made firmware from your web browser and set everything else up on the boards' setup pages.
Do I need to solder?
No. The jumper wires push onto the board's pins, Wago lever connectors join them to the button wires, and the light strip connects over Bluetooth.
Do I need Wi-Fi or an app?
No app. Out of the box, the boards talk to each other directly over their own radio (ESP-NOW), and the booth board talks to the strip over Bluetooth. Wi-Fi is optional: it adds range and lets you open the setup pages from your network. Each board just needs a USB-C charger.
Can I use a different LED strip?
Yes, if it's an ELK-BLEDOM strip (duoCo Strip or Lotus Lantern apps) or a Happy Lighting strip (Triones, QHM, LEDBLE, LEDBlue, Dream). Choose it on the booth's setup page. Govee, Magic Home and Tuya / Smart Life strips use different or encrypted Bluetooth commands and aren't supported.
Is it safe to put on our church Wi-Fi?
Every message between the boards is signed with your passcode, so nothing else on the network can raise a call, and the setup pages ask for the passcode too. Change the factory passcode (boothlight) on every board when you set them up.
I built mine with an earlier download. What changes?
Flash every board with firmware 2.6, then name your stations and pick their colors on the booth's setup page (Step 4). The booth keeps the strip it was paired with.
Can I still use the strip's phone app?
Only when the booth board is unplugged. The strip's controller accepts one connection at a time, and the booth board keeps it connected so calls always show.
Can I use different ESP32 boards?
Most ESP32-WROOM-32 development boards work with the same files. The parts linked here are the ones I've built with.
What if a button board is too far away?
If its blue light keeps blipping, move it a few feet, keep its case away from metal, or move the booth board for a clearer line.
Can I add more buttons or change the colors?
Yes. Add call boards, wired the same way, up to 8 stations. Each station gets its own name, color and effect on the setup page. Colors can't be shared between stations, and red stays reserved for the red alert.
Can I acknowledge a call from my phone?
Yes. Open the booth's setup page on a phone on your Wi-Fi and tap Acknowledge (or Clear red, which asks you to confirm).
Get the free download
Everything you need is in one free zip: firmware 2.6 for the booth and the call buttons, and a setup guide covering flashing, the setup pages, stations and colors, Wi-Fi, the light strip and the passcode.
If you build one for your church, I'd love to see it. Leave a comment below or tag me.
As an Amazon Associate I earn from qualifying purchases. Product links in this post are affiliate links; they cost you nothing extra and help support this blog.
